11 Tips For Choosing The Right Colors/11 nippi, kuidas värve valida

Kuigi ma pole mingi ekspert, meeldib mulle väga värve sobitada. Seega paningi kokku mõned toredad nipid, mis võivad Sindki aidata.

***

Although I’m not an expert, I enjoy creating color combos. That’s why I put together some tips that may help you.

🦋

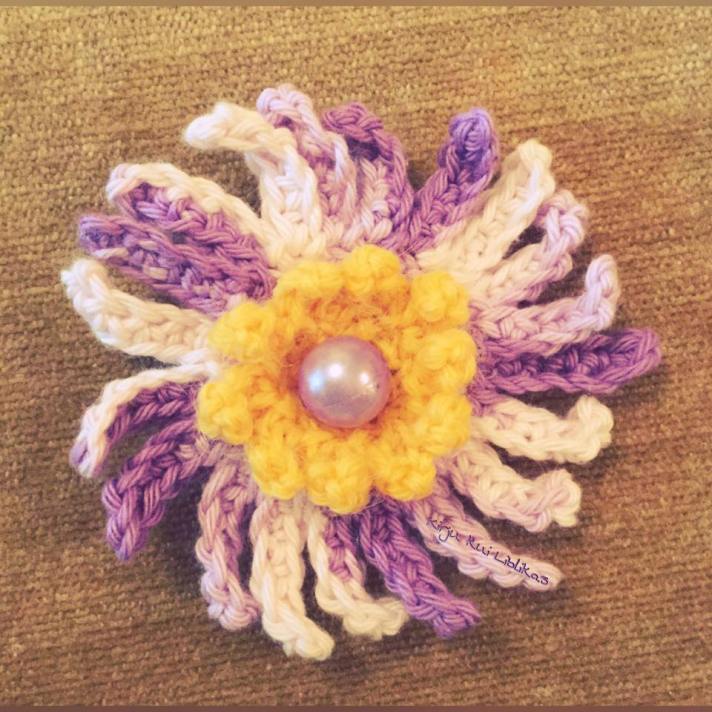
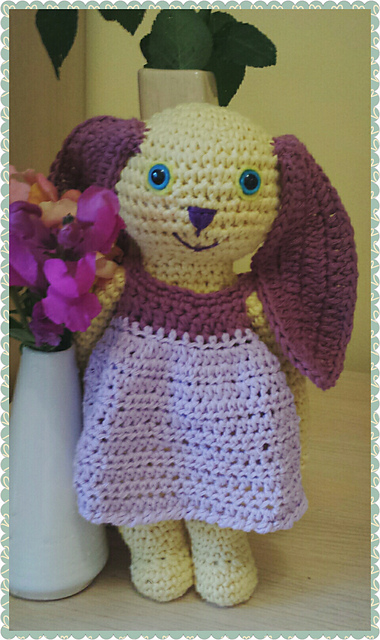
Ülivingeid kombinatsioone moodustavad värviringil üksteise vastas paiknevad toonid. Kollane ja lilla, punane ja roheline, sinine ja oranž. Vastasvärvid panevad üksteist kirkamalt särama ja loovad mõnusa meeleolu. Eriti meeldib mulle kollase-lilla kombo, kuna see loob illusiooni kollasest suveõhtust lillade varjudega. Ära aga nendega ka liiale mine. Terve ruum täis kollast ja lillat võib mõjuda eemaletõukavana, aga valge ruum kollase seina ning lillade ja kollaste detailidega on kaunis ja eriline.

***

Colors that are opposite to each other on the color wheel make awesome combos. Yellow and violet, red and green, blue and orange. Complementary colors make each orher pop brightly and create a nice mood. I’m especially fond of the purple-and-yellow combo, because it creates the illusion of a warm summer evening with yellow sunshine and purple shadows. However, don’t go overboard with those colors. A whole room full of purple and yellow can be overwhelming and just plain too much, but a white room with a yellow wall and purple&yellow details may turn out to beautiful and unique.


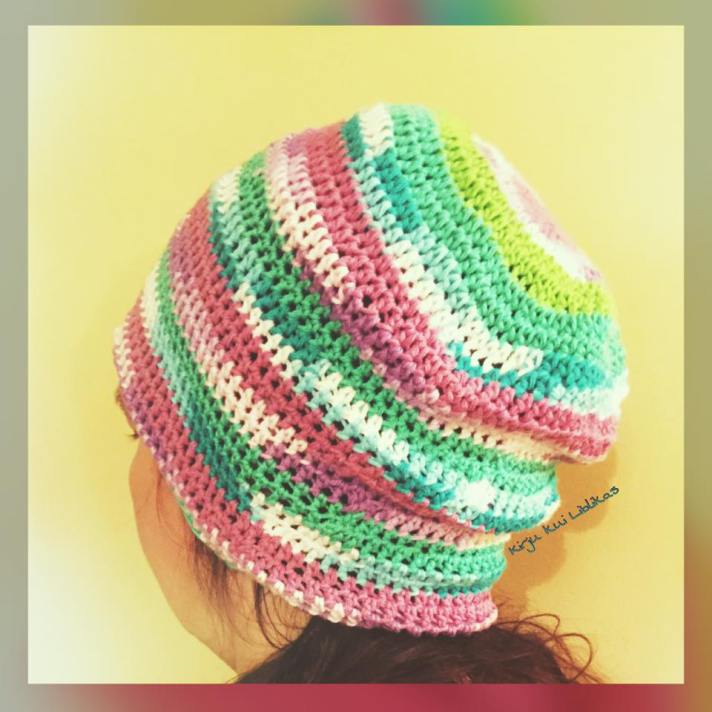
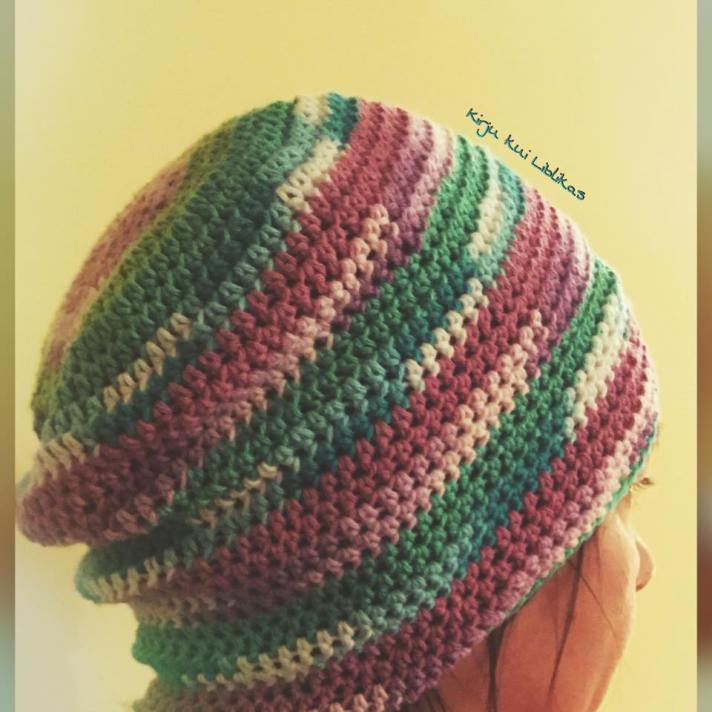
Proovi uskumatuna tunduvaid kombinatsioone. Lilla ja roheline, roosa ja roheline, sinine ja punane. Ma ei olnud iial mõelnud lilla-rohelise kombole, aga nüüd meeldib see mylle väga.

***

Try color combos that seem impossible. Purple and green, pink and green, blue and red. I would never have thought of putting green together with purple, but now I love it.

🦋

Hoia kontrastil silm peal. Kui teed näiteks mitmevärvilist kudet, pole oluline mitte ainult värvide vahe, vaid ka värvide kontrasti erinevus. Proovi nii: aseta lõngad lauale, tee neist pilt ja muuda pilt siis fototöötlusäpis mustvalgeks. Kui üks värv on tunduvalt tumedam ja teine heledam, siis tuleb tulemus tavaliselt parem, kui ühtlaselt halle toone kasutades.

***

Be careful with contrast. If you’re doing fair isle knitting, for example, then you should not only use different colors, but also make sure they have enough contrast. Try it: place the yarns on your table, take a picture and make it black&white in a photo editing app. If one color is much darker than the other, the result will usually be much better than when both colors are equally gray.

🦋

Kui üleküllastunud värvid pole just sinu stiil, siis ole nendega ettevaatlik.

***

Unless oversaturated colors are your style, be very careful when using them.

🦋

See kuulub küll rohkem pilditöötluse valdkonda, aga hoidu vintage filtritest, kui need just pole su stiil. Vintage-filtreid kasutavad paljud selleks, et kaunistada öösel või hämaras tehtud pilte. Ebakvaliteetset pilti ei saa ka miljoni filtriga kvaliteetseks. Oota pildistamisega hommikuni, tee naturaalses valguses pilt ja tuuni seda õrnalt.

***

This tip is actually about photo editing, but still: stay away from vintage filters unless they are your style. Many people use retro filters to edit photos that are taken at night or in bad lighting. You can add a million filters to a bad photo, but it still won’t have a good quality. Wait until the morning, take the photo in natural lighting and edit it lightly.

🦋

Proovi leida mõni inspireeriv pilt, millelt saad leida endale sobiva värvikombo.
***

Find an inspiring photo and use the same colors.

🦋

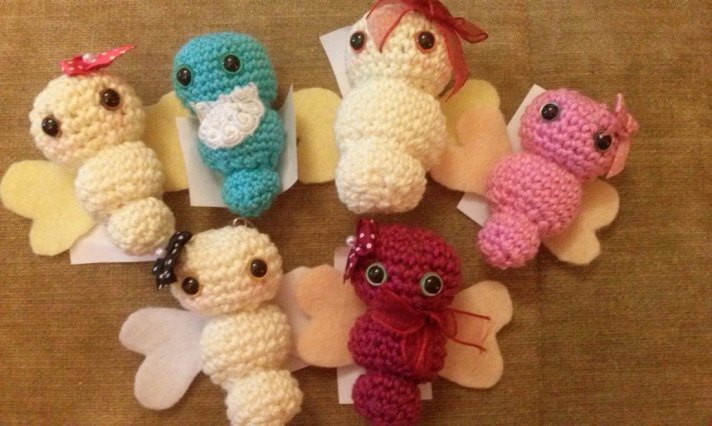
Mõtle, millist vibe’i soovivad välja anda. Minu lemmikud toonid on sinine ja türkiis, mis on rahulikud toonid. Need sümbliseerivad lojaalsust, tarkust ja turvalisust, samas aga ka külmust ja hirmu. Teine lemmiktoon roosa on tähenduse poolest mänguline, rõõmus ja armas, aga samas ka ebaküps ning nõrk. Jäta aga meelde, et see on vaid üldistus. Näiteks heleroosa seostub enamikule laste, vahukommide ja lilledega, fuksia aga võimu ning stiiliga, neoonroosa energilisuse, noortepärasuse ja intensiivsusega. Kuigi indigosinine on tihti seotud võimu ja tarkusega, võib mõni helesinise toon olla väga lõbus.

***

Think of the vibe you want to have. My favorite colors are blue and turquoise which are calm shades. They symbolize wisdom, loyality and security, but also coldness and fear. My other favorite color, pink, is associated with playfulness, fun and sweetness, but also immaturity and weakness. However, keep in mind that these are general statements. For example, most people associate light pink with kids, marshmallows and flowers. Fuchsia is often associated with power and style and neon pink with energy, youth culture and intensity. Although indigo blue is often used to symbolize power and smartness, some shades of light blue are very cheerful.

🦋

Kui kasutad ainult sooje või ainult külmi värve, siis ürita nende vahele natuke panna ka teise soojusastmega toone. Näiteks punakuldset sügisstseeni maalides lisa varjudesse natuke lillakassinist.

***

If you’re only using cold or warm colors, try to squeeze in some complementary shades. When painting a golden autumn scene with red leaves, add a bit of purple-ish blue to the shadows.

🦋
Räägi kaasa – mis on Sinu lemmikud nipid värvide sobitamiseks?

What are your favorite tips for choosing colors?

Tutorial – Crocheted Ombre Effect Using Sewing Thread/Õpetus: heegeldatud ombre üleminek kasutades õmblusniiti

See lihtne, ent aeganõudev trikk on igati proovimist väärt. Soovitan enne teha nelja või viite niiti koos hoides väike proovilapp, et uudse materjaliga harjuda ja leida sobiv heegelnõela suurus. *** 

This easy, but time-consuming trick is worth trying. Before you start, do a little swatch to get used to the new material and find the right sized crochet hook. 

Scroll down for the English version!


Eesti keeles:

Alusta 4 või 5 kokkupandud õmblusniidiga. Mina kasutasin nelja. Kaks tükki võtsin keskmiselt rohelised, ühe briljantrohelise ja ühe lihtsalt tumerohelise. Heegeldasin kaks esimest rida. (Krokodillisilmustega heegeldades ei jää esimest kahest reast näha, seega vaata lihtsalt kõige alumise rea lehti.) 

Siis katkestasin kõige tumedama värvi ning selle asemele võtsin helerohelise. Heegeldasin veel kaks rida ning katkestasin siis tumerohelise, võttes selle asemele kreemikasvalge niidi. Nüüd olid mul heleroheline, kreemikasvalge ja kaks keskmiselt rohelist niiti. Heegeldasin kaks rida ning katkestasin ühe keskmistest rohelistest. Selle asemele panin sidrunkollase niidi. Kaks rida, katkestasin teise rohelise ja asendasin selle samuti sidrunkollasega. Kaks rida, katkestasin helerohelise ja võtsin selle asemel tumekollaka niidiga.

Seega, varieeri iga kahe (või ükskõik mis muu arvu) rea tagant niite. Soovitan kasutada väga sarnaseid toone ja mitte tekitada kohti, milles oleks tugevat kontrasti näha.
In English:

Start with 4 or 5 threads held together. I used four. Two of them were medium green, one was bottle green and one was just dark green. I crocheted the first two rows. (When you’re crocheting using crocodile stitch, the first row of the two never shows up, so just look at the lowest row of scales.)

Then, I replaced the darkest color with a light green one. I crocheted another two rows and switched the other dark green with a natural white strand. Now, my colors were natural white, light green and two strands of medium green. I crocheted another two rows and switched one of the medium green threads with a lemon yellow one. Two rows, then I replaced the other medium green with another strand of lemon yellow. Two rows, then I replaced the light green with a darker shade of yellow.

That means you should replace one or two of the threads after every two (or any other number of) rows. I recommend using very similar tones and not creating rows which have obvious color changes.  

***

Loodan, et see väike õpetus oli tore ja sellest oli kellelegi kasu!

I hope you liked this little tutorial and it helped someone! 

Arbuusimüts/ Watermelon hat

Mul on suhteliselt suur varu Drops Air lõnga ja otsustasin mütse kududa. Esimesest mütsist näete ilmselt pilte järgmises postituses, aga peale seda otsustasin teha lühendatud ridadega mütsi. Kuna selle konstruktsioon on üsna põnev, otsustasin sellele ka õpetuse kirjutada. ❤️🍉🌷

***

I have quite a big stash of Drops Air and I decided to knit a few hats. I’ll post pictures of my first hat in the next post, but after that I decided to make a hat with short rows. As the construction is quite interesting, I decided to write a pattern for it. ❤️🍉🌷

Scroll down for the English version!


Eesti

Vajalikud materjalid:

Lõng worsted jämeduses (st lõng, mis sobib varrastele u 5mm varrastele). Mina kasutasin lõnga Drops Air (toonis rose 20) ja kulus 1 tokk ehk 50g.

4.5mm vardad.
Suurus: Sobib teismelise/täiskasvanu peale, suurust saab kergelt muuta.
Vajalikud oskused: Silmuste loomine, parempidi ja pahempidi kudumine, pärlkude, ripskude ja lühendatud read.
Raskustase: Algaja.
pp – parempidi

ph – pahempidi

pärlkoes – *1 pp, 1 ph*

m&p – mähi ja pööra
Loo 40 s.

1. 7 s pärlkoes, 33 s pp.

2. 33 s pp, 7 s pärlkoes.

3. 7 s pärlkoes, 31 pp, m&p, 31 pp, 7 s pärlkoes.

4. 7 s pärlkoes, 29 pp, m&p, 29 pp, 7 s pärlkoes.

5. 7 s pärlkoes, 27 pp, m&p, 27 pp, 7 s pärlkoes.

6. 7 s pärlkoes, 25 pp, m&p, 25 pp, 7 s pärlkoes.

7. 7 s pärlkoes, 23 pp, m&p, 23 pp, 7 s pärlkoes.

8. 7 s pärlkoes, 21 pp, m&p, 21 pp, 7 s pärlkoes.

9. 7 s pärlkoes, 33 pp.

10. 33 pp, 7 s pärlkoes.

11. 7 s pärlkoes, 33 pp.

12. 33 pp, 7 s pärlkoes

13. 7 s pärlkoes, 33 pp.

14. 7 s pärlkoes, 23 pp, m&p, 21 pp, 7 s pärlkoes.

15. 7 s pärlkoes, 25 pp, m&p, 23 pp, 7 s pärlkoes.

16. 7 s pärlkoes, 27 pp, m&p, 25 pp, 7 s pärlkoes.

17. 7 s pärlkoes, 29 pp, m&p, 27 pp, 7 s pärlkoes.

18. 7 s pärlkoes, 31 pp, m&p, 31 pp, 7 s pärlkoes.

19. 7 s pärlkoes, 33 pp.

20. 33 pp, 7 s pärlkoes.

Korda ridu 1-20 veel 3, 3,5 või 4 korda. Mina kudusin 3.5 mustrikordust (viimase jätsin poole pealt katki), ent arvan, et 4 oleks parem olnud. Kui tunned, et müts on siis veel liiga väike, aga pool mustrikordust juurde on liiga palju, siis koo lihtsalt paar rida ripskoes. Tõmba lõng kõigi mütsi ülaosas olevatest ripsivallide äärmistest silmustest läbi ja õmble müts kokku.

Palju õnne, sinu müts on valmis!

***

In English

Supplies needed:

Worsted weight yarn. I used Drops Air (in rose 20) and the hat used one skein/50g.

4.5mm needles.
Size: Suitable for a teen or adult head, size is easily customizable.
Skills needed: Casting on, knitting, purling, seed stitch, garter stitch, short rows, casting off.
Difficulty level: Easy.
k – knit

p – purl

w&t – wrap and turn

s – stitch, stitches
Cast on 40 s.

1. 7 s in seed stitch, k 33.

2. K 33, 7 s in seed stitch.

3. 7 s in seed stitch, k 31, m&p, k 31, 7 s in seed stitch.

4. 7 s in seed stitch, k 29, m&p, k 29, 7 s in seed stitch.

5. 7 s in seed stitch, k 27, m&p, k 27, 7 s in seed stitch.

6. 7 s in seed stitch, k 25, m&p, k 25, 7 s in seed stitch.

7. 7 s in seed stitch, k 23, m&p, k 23, 7 s in seed stitch.

8. 7 s in seed stitch, k 21, m&p, k 21, 7 s in seed stitch.

9. 7 s in seed stitch, k 33.

10. K 33, 7 s in seed stitch.

11. 7 s in seed stitch, k 33.

12. K 33, 7 s in seed stitch.

13. 7 s in seed stitch, k 21, m&p, k 21, 7 s in seed stitch.

14. 7 s in seed stitch, k 23, m&p, k 23, 7 s in seed stitch.

15. 7 s in seed stitch, k 25, m&p, k 25, 7 s in seed stitch.

16. 7 s in seed stitch, k 27, m&p, k 27, 7 s in seed stitch.

17. 7 s in seed stitch, k 29, m&p, k 29, 7 s in seed stitch.

18. 7 s in seed stitch, k 31, m&p, k 31, 7 s in seed stitch.

19. 7 s in seed stitch, k 33.

20. K 33, 7 s in seed stitch.
Repeat rows 1-20 for 3, 3,5 or 4 times. I repeated them for 3,5 times (finished knitting the last one halfway through), but I think 4 would have been better. If you feel like the hat is still too small, but a half of a pattern repeat is too much to add, just knit a few rows in garter stitch. Draw the yarn through the last stitches of the garter ridges on top of the hat and sew the hat together.
Congratulations, you’ve finished your hat!


Crochet flower brooch tutorial/heegeldatud lilleprossi õpetus

Kirjutasin heegeldatud lilleprossi õpetuse. 🙂 Kes valmis saab, jagagu pilte ikka minu kakskeelses FB grupis “Amigurumi MCAL by Kirju kui Liblikas – salajane koosheegeldamine”. Seal saab ka muud käsitööd jagada ja niisama arutada. Või täägi mind Instagramis (kirju_kui_liblikas). 🙂
***
If you have finished a hat with this design, share pics in my bilingual FB group “Amigurumi MCAL by Kirju kui Liblikas – salajane koosheegeldamine 2016”. You can also share your other crafts there and just discuss crafting. Or tag me in Instagram (kirju_kui_liblikas). 🙂
SCROLL DOWN FOR ENGLISH VERSION!
Picture

Eesti keeles

Materjalid
Lõng: Kasutada  võib ükskõik millist lõnga. Mina kasutasin kirjut Novita Cotton Softi, millest valmisid prossi alus ja suuremad õielehed. Prossi sisemised õielehed ja aluse kaks esimest ringi valmisid kuldkollase Novita Nallega.
Heegelnõel: Mina kasutasin heegelnõela suuruses 2.5 mm. Heegelnõel võiks jääda 2mm kuni 3mm vahele, olenevalt sellest, kui tihedalt heegeldada.
Lisamaterjalid: Sukanõel, käärid, mõni vana väike lapik rinnamärk, superliim.
Lühendid
As – aassilmus
Ah – ahelsilmus
Ks – kinnissilmus
Kasv – kaks ks samasse silmusesse

Prossi alus
Amigurumi tehnikas spiraalselt heegeldamine. Alusta kollase lõngaga.
1.ring: Võluring ja 6 ks sinna (6 s)
2. ring: Kasv 6 korda (12)
Kinnita lilla lõng ning asu sellega heegeldama.
3. ring: *1 ks järgmisesse silmusesse, kasv* 6 korda (18)
4. ring: *1 ks järgmisesse 2 silmusesse, kasv* 6 korda (24)
5. ring: *1 ks järgmisesse 3 silmusesse, kasv* 6 korda (30)
Lõpeta heegeldamine ja jäta pikk lõngasaba.

Sisemised õielehed
Kasuta kollast lõnga.
Heegelda 10 ah ja ühenda need as-ga ringiks
1.ring: *4 ah, ks heegelnõelast teise ah-sse, 2 ks, as järgmisesse silmusesse* 10 korda.
Lõpeta heegeldamine ja jäta pikk lõngasaba.

Välimised õielehed
Kasuta lillat lõnga.
Heegelda 20 ah ja ühenda need as-ga ringiks
1.ring: *6 ah, ks heegelnõelast teise ah-sse, veel 4 ks, as järgmisesse silmusesse* 10 korda.
Lõpeta heegeldamine ja jäta pikk lõngasaba.

Õie kokku panemine
Laota õie põhjale esmalt välimine õielehering. Õmble välimine õielehering läbi ah-de põhja lilla osa külge. Ära õielehti endid kinnita.Nüüd paiguta sisemine õielehering põhja kollasele osale ja õmble samamoodi läbi sõõri ümbritsevate ah-de põhjale. Peida lõngaotsad. Keera õis tagurpidi ja pigista lille tagumise osa keskele liimi. Suru sellele pross. Palju õnne, Sinu pross on valmis!

In English

Supplies needed
Yarn: Use any yarn. I used variegated Novita Cotton Soft for the base and the outer petals. The inner petals and the first two round of the base are made with golden Novita Nalle.
Crochet hook: I used a 2.5mm hook. The crochet hook size should stay between 2mm to 3mm, depending on your crocheting tension.
Additional materials: A darning needle, scissors, a small old flat brooch, super glue.
Abbreviations (US)
Sl st – slip stitch
Ch – chain
Sc – single crochet
Inc – 2 sc into the same stitch

The base of the brooch
Amigurumi style crochet, worked spirally. Start with the yellow yarn.
Round 1: Begin with a magic ring and work 6 scs into it. (6)
Round 2: 2 sc in every stitch (12)
Begin crocheting with purple yarn.
Round 3:  *1 sc in the next stitch, 2sc in next* 6 times (18)
Round 4: *1 sc in the next 2 stitches, 2sc in next * 6 times (24)
Round 5: *1 sc in the next 3 stitches, 2sc in next * 6 times (30)
Fasten off and leave a long yarn tail.

Inner petals
Use yellow yarn
Ch 10 and join into a round with a slip stitch.
Round 1: *Ch 4, sc into the 2nd ch from hook, sc 2, sl st into the next stitch* 10 times,  sl st in the first ch.
Fasten off and leave a long yarn tail.

Outer petals
Use purple yarn.
Ch 20 and join into a round with a slip stitch.
Round 1: *Ch 6, sc into the 2nd ch from hook, sc 4, sl st into the next stitch* 20 times,  sl st in the first ch.
Fasten off and leave a long yarn tail.

Putting the flower together
First, lay the first outer circle of petals onto the base of the brooch. Sew the outer circle of petals to the purple part of the base through the chain stitches. Do not attach the petals. Now, lay the inner circle of petals out onto the yellow part of the base and attach in the same way (through the chains). Weave in the yarn tails. Turn the flower upside down and squeeze some glue onto the middle of the flower. Place the brooch on it. Congratulations, your brooch is finished!

Crochet beanie pattern/Heegeldatud surfimütsi õpetus

Hei!
Tundub, et Eestit on haaranud surfimütsivaimustus. Mina kirjutasin omamoodi juhendi nüüd valmis. Loodan, et on kellelegi abiks. Kes valmis saab, jagagu pilte ikka minu kakskeelses FB grupis “Amigurumi MCAL by Kirju kui Liblikas – salajane koosheegeldamine”. Seal saab ka muud käsitööd jagada ja niisama arutada. Või täägi mind Instagramis (kirju_kui_liblikas). 🙂

Hi!
It seems to me that the newest crafting trend in Estonia is cotton surf hats (I think they remind me of beanies, though). I wrote a pattern for them now. Hope it will help someone. If you have finished a hat with this design, share pics in my bilingual FB group “Amigurumi MCAL by Kirju kui Liblikas – salajane koosheegeldamine 2016”. You can also share your other crafts there and just discuss crafting. Or tag me in Instagram (kirju_kui_liblikas). 🙂
SCROLL DOWN FOR THE ENGLISH VERSION!

Picture
Picture

EESTI KEELES

Sellist mütsi on üsna lihtne teha ning selle suurust saab kergelt reguleerida. Õpetus on paindlik ja selle järgi saab teha mütsid kõigile, alates mudilastest ja lõpetades täiskasvanutega.
Materjalid
Lõng: Mina kasutasin puuvillast lõnga, mis lõngavöö kohaselt peaks sobima 2mm-3.5mm heegelnõelale. Üldiselt võikski kasutada umbes sellises jämeduses puuvilla. Näiteid sobivatest lõngadest: Drops Loves You 6, Steinbach Wolle Capri, Schachenmayr Catania, Madame Tricote Camilla, Novita Cotton Soft. Mina kasutasin neist siis kahes toonis Novita Cotton Softi (kirjud toonid), tuhmlillat Drops Loves You 6-te, helerohelist Katia Amigurumit ning rohelist Madame Tricote Camillat. Iga värvi kulus alla poole toki.
Heegelnõel: Mina kasutasin heegelnõela suuruses 2.5 mm. Heegelnõel võiks jääda 2mm kuni 3mm vahele, olenevalt sellest, kui tihedalt heegeldada.
Lisamaterjalid: Sukanõel, käärid.
Lühendid
Psm – poolsammas
Kasv: 2 poolsammast samasse silmusesse
Ah: ahelsilmus
As – aassilmus
NB: Rea alguses olevad 3 aassilmust loevad ühe poolsambana. Mina aga soovitan 3 ah asendada „seisva silmusega“, mis on minu arvates kordades kaunim ja korrektsem. Leia õpetus siit! http://www.mooglyblog.com/standing-double-crochet-joining/
NB: Soovitan heegeldada üsna tugevalt ja kõvasti, et auke vältida. Muidugi peaks heegeldamise tugevus jääma mõistuse piiridesse, sõrmed ei pea ka valusaks jääma.
Müts heegeldatakse ülevalt alla. Kõigepealt tehakse korrapäraselt kasvatades suur lapik ketas, siis jätkatakse heegeldamist ilma kasvatamata.
Kõigepealt mõõda mõõdulindiga ära oma peaümbermõõt. Minu oma on 55 cm. Siis jaga see 3.14-ga. Mina sain tulemuseks u 17,8 cm, mille ümardasin 18-ks. Niimoodi saad ringi (pealae) umbkaudse diameetri juhul, kui meie pea oleks ideaalne kera ja kui heegeldatud pind ei veniks. Kuna aga meie pea pole ideaalse kera kujuga ning heegeldatud pind venib, saame me diameetrist vabalt u 3 cm maha võtta. Seega jääb ümbermõõduks 15 cm.
Müts ei ole heegeldatud spiraalselt, vaid iga ring on ühendatud.
1.ring: Võluring, 3 ah ja 11 psm sellesse, as kolmandasse ah-sse. (12)
2.ring: 3 ah, psm samasse silmusesse, kasv 11 korda, as kolmandasse ah-sse. (24)
3.ring: 3 ah, kasv, *psm, kasv* 11 korda, as kolmandasse ah-sse. (36)
4.ring: 3 ah, psm, kasv, *2 psm, kasv* 11 korda, as kolmandasse ah-sse. (48)
5.ring: 3 ah, 2 psm, kasv, *3 psm, kasv* 11 korda, as kolmandasse ah-sse. (60)
6.ring: 3 ah, 3 psm, kasv, *4 psm, kasv* 11 korda, as kolmandasse ah-sse. (72)
7.ring: 3 ah, 4 psm, kasv, *5 psm, kasv* 11 korda, as kolmandasse ah-sse. (84)
Nüüd venita heegeldust veidi käte vahel ning laota see siledale pinnale. Kui selle diameeter on umbes (võib olla ka õige pisut vähem) sama, mis enne arvutasid (minu puhul 15 cm), on mütsipõhi valmis. Kui see on alla 14 cm, siis heegelda veel üks ring samas kasvatusrütmis. Minule piisas küll seitsmest ringist.
Ringid 8-30: 3 ah, psm igasse silmusesse rea lõpuni, as kolmandasse ah-sse. Soovi korral võid neid ringe heegeldada veidi vähem või rohkem (olenevalt sellest, kui suur hipi oled:) ).
31.ring: 1 ah, ks igasse silmussesse rea lõpuni, as esimesse ah-sse.
Lõpeta heegeldamine ja jäta pikk lõngasaba. Peida lõngaotsad. Palju õnne, Sinu müts on valmis!

In English

This hat is quite easy to make and the sizing can easily be changed. The pattern is flexible and it can be used to make hats for everyone from toddlers to adults.
Supplies needed
Yarn: I used cotton yarn suitable for a 2mm-3.5mm hook. Generally, you should use sport wight cotton. Some examples: Katia Amigurumi, Drops Loves You 6, Steinbach Wolle Capri, Schachenmayr Catania, Madame Tricote Camilla, Novita Cotton Soft. I used Novita Cotton Soft in two variegated colors, dull purple Drops Loves You 6, light green Katia Amigurumi and green Madame Tricote Camilla. I used less than half a skein of each color.
Crochet hook: I used a 2.5mm hook. The crochet hook size should stay between 2mm to 3mm, depending on your crocheting tension.
Additional supplies: A darning needle and scissors.
Abbreviations (US)
Hdc – half double crochet
Inc – 2 hdcs in the same stitch
Ch – chain
Sl st – slip stitch
NB: The first 3 chs at the beginning of the round count as one hdc. I would advise you to replace them with a standing stitch, which is (in my opinion) much nicer and neater. Find the tutorial here! http://www.mooglyblog.com/standing-double-crochet-joining/
NB: Your crochet tension should be quite tight to avoid holes. Of course the tension shouldn’t be so tight that it would hurt your fingers.
The hat is made top down. At first, a large flat circle is made by increasing, then it is made into a tube by crocheting without any increases.
Firstly, use a tape measure to measure your head circumfence. Mine is 55 cm. Divide it by 3.14. My result was approximately 17.8 cm, which I rounded to 18 cm. This way you can get an ideal diameter (if our head was a perfect sphere and if crocheted fabric didn’t stretch. As neither of those conditions are possible, we can remove abour 3 cm from the diameter. This way the final diameter is about 15 cm.
The hat is not crocheted in spiral, each round is joined.
Round 1: Magic ring, 3 ch and 11 hdc in it, sl st in the third ch. (12)
Round 2: 3 ch, hdc in the same stitch, inc 11 times, sl st in the third ch. (24)
Round 3: 3 ch, inc, *hdc, inc* 11 times, sl st in the third ch. (36)
Round 4: 3 ch, hdc, inc, *2 hdc, inc* 11 times, sl st in the third ch. (48)
Round 5: 3 ch, 2 hdc, inc, *3 hdc, inc* 11 times, sl st in the third ch. (60)
Round 6: 3 ch, 3 inc, *4 hdc, inc* 11 times, sl st in the third ch. (72)
Round 7: 3 ch, 4 inc, *5 hdc, inc* 11 times, sl st in the third ch. (84)
Now, stretch the crocheted fabric between your hands (not too much, just a bit) and lay it on a smooth surface. If the diameter is approximately the same as you calculated before (15 cm in my case), you can finish increasing. If it is less than 14 cm, crochet another round in a similar increasing manner. If it’s still not enough, keep increasing in the same way. 7 rounds was enough for me, though.
Rounds 8-30: 3 ch, hdc in every stitch until the end of the round, sl st into the third ch. If you want, you can crochet more or less rounds (depending on how dominant your inner hippie is:) ).
Round 31: 1 ch, sc in every stitch until the end of the round, sl st into the first ch.
Fasten off and leave a long yarn tail. Weave in the ends. Congratulations, your hat is finished!

Mina lisasin mütsile ka lillega prossi, mille õpetuse samuti ise kirjutasin. Leia see siit:
I also added a flower brooch to the hat. Yeah, I made the pattern up myself and wrote it up too. Find it here:

Nukk Õie muster/Blossom the Doll pattern

Hi!
This is my new pattern for doll Blossom. I hope you will enjoy it!

Terekest!
See on nukk Õie muster. Loodan, et meeldib!

EESTI KEELES/IN ESTONIAN

Materjalid
Lõng: Võid kasutada igasugust lõnga. Mina kasutasin kirjude juustega nuku tarvis Steinbach Wolle Caprit, Madame Tricote Paris Camillat ja Katia Amigurumit.
Lisad: Lõngajääke või heiet juusteks, tikkimisniiti nuku silmadeks. Kui soovid, võid nukule teha roosad põsed, kasutades kas punast pliiatsit, rasvakriiti või pehmet pastelli. Samuti on võimalik kasutada päris puudrit. Püsimajäävateks tulemusteks on inimesed kasutanud veekindlaid markereid – ent mina pole seda eales proovinud ning seetõttu ei saa nõu anda. Mõned ökopoed võivad müüa ka lapse- ning keskkonnasõbralikumaid, naturaalsel vahal baseeruvaid puudreid.
Heegelnõel: Kasutasin nr 2.5 mm, ent nagu olen varasemates mustrites maininud, kasutan seda peaaegu kõikidele lõngadele, kuna muudan jooksvalt oma heegeldamistihedust. Parimateks tulemusteks vali heegelnõel, mis on vähemalt 1 suurus lõngavööl soovitatust väiksem.
Kõik autoriõigused kehtivad. Mustrit ei tohi jagada, müüa ega levitada ilma minu kirjaliku nõusolekuta, ent valmis nukke võib müüa. Kui oled otsustanud nukku müüa, ei pea, aga võiksid lisada väikese märgise, et mina (Liisa Oks) olen mustri autor. Oleksin selle üle väga tänulik!
Kui vajad mustriga abi, küsi kas minu Ravelry või Facebooki grupis ((Rav: „Kirju kui Liblikas designs and CALs“ ja FB: „Amigurumi MCAL 2016 by Kirju kui Liblikas – salajane koosheegeldamine 2016“) või kirjuta mulle Ravelrys – mul on hea meel aidata. Kui soovid, jaga nendes gruppides oma loomingut – teiste tööde nägemine on vahva.

Eriline lühend
Tpltkasv – topeltkasvatus, 3 ks ühte ja samasse silmusesse

Pea (Tee 1)
Võluring ja 6 ks sinna. Heegelda spiraalselt amigurumi tehnikas.
1.ring: 2 ks igasse silmusesse.
2.ring: *1 ks järgmisesse silmusesse, kasv* 6 korda.
3.ring: *1 ks järgmisesse 2 silmusesse, kasv* 6 korda.
4.ring: *1 ks järgmisesse 3 silmusesse, kasv* 6 korda.
5.ring: *1 ks järgmisesse 4 silmusesse, kasv* 6 korda.
6.ring: *1 ks järgmisesse 5 silmusesse, kasv* 6 korda.
7.ring: *1 ks järgmisesse 6 silmusesse, kasv* 6 korda.
Ringid 8-16: 1 ks igasse silmusesse.
17.ring: *1 ks järgmisesse 6 silmusesse, kah*6 korda.
18.ring: *1 ks järgmisesse 5 silmusesse, kah* 6 korda.
19.ring: *1 ks järgmisesse 4 silmusesse, kah* 6 korda.
20.ring: *1 ks järgmisesse 3 silmusesse, kah* 6 korda.
21.ring: *1 ks järgmisesse 2 silmusesse, kah* 6 korda.
Ringid 22-23: 1 ks igasse silmusesse.
Lõpeta heegeldamine ja jäta pikk lõngasaba.

Tiki silmad eraldi vildile, lõika vildist paarimillimeetrise õmblusvaruga välja ja õmble vilt peitepistetega nuku näole.

Käed (Tee 2)
Võluring ja 6 ks sinna. Heegelda spiraalselt amigurumi tehnikas.
1.ring: 1 ks järgmisesse silmusesse, kasv* 6 korda.
2-18.ring: 1 ks igasse silmusesse.
Lõpeta heegeldamine ja jäta pikk lõngasaba.

Jalad (Tee 2)
6 as. Heegelda spiraalselt amigurumi tehnikas.
1.ring: Jäta 1 silmus vahele, 4 ks, tpltkasv, jätka heegeldamist keti teiselt poolt, 4 ks, tpltkasv esimesse ahelsilmusesse.
2.ring: 5 ks, tpltkasv, 5 ks, tpltkasv, 1 ks.
3.ring: 6 ks, tpltkasv, 7 ks, tpltkasv, 2 ks.
Ringid 4-5: 1 ks igasse silmusesse.
6.ring: 6 ks, kah 3 korda, 8 ks.
7.ring: 5 ks, kah 3 korda, 6 ks.
8.ring: 5 ks, kah 2 korda, 5 ks.
Ringid 9-18: 1 ks igasse silmusesse.
Lõpeta heegeldamine ja jäta pikk lõngasaba.
Täida ainult jala alaosa. Peale täitmist heegelda jalg ülevalt kokku. Õmble jalad keha külgedele ja kinnita ka pisut altpoolt keha külge, et jalad kenasti ja sirgelt hoiaks.

Keha (Tee 1)
Võluring ja 6 ks sinna. Heegelda spiraalselt amigurumi tehnikas.
1.ring: 2 ks igasse silmusesse.
2.ring: *1 ks järgmisesse silmusesse, kasv* 6 korda.
3.ring: *1 ks järgmisesse 2 silmusesse, kasv* 6 korda.
4.ring: *1 ks järgmisesse 3 silmusesse, kasv* 6 korda.
5.ring: *1 ks järgmisesse 4 silmusesse, kasv* 6 korda.
Ringid 6-10: 1 ks igasse silmusesse.
11.ring: *1 ks järgmisesse 4 silmusesse, kah* 6 korda.
Ringid 12-15: 1 ks igasse silmusesse.
16.ring: *1 ks järgmisesse 3 silmusesse, kah* 6 korda.
Ringid 17-20: 1 ks igasse silmusesse.
16.ring: *1 ks järgmisesse 2 silmusesse, kah* 6 korda.
Lõpeta heegeldamine ja jäta pikk lõngasaba.

Õmble pea ja käed keha külge. Lisa nukule juuksed ja aksessuaarid. Palju õnne, nukk on valmis!

INGLISE KEELES/IN ENGLISH

Materials
Yarn: You can use any kind of yarn. I used Steinbach Wolle Capri, Madame Tricote Paris Camilla and Katia Amigurumi for the doll with colorful hair.
In addition: Yarn scraps or roving for hair, embroidery thread for the doll’s eyes. If you wish, you can create rosy cheeks with either a red pencil, crayon or a red soft pastel. Real blush is also an opinion. For permanent results, people have used a permanent marker – but I haven’t ever tried it and therefore cannot give any advice. Some eco shops might also sell natural wax-based blush for more environment-friendly and kid-friendly solutions.
Hook: I used 2.5 mm, but as I’ve mentioned in my previous patterns, I use this hook for basically everything, as I can adjust my own crocheting tension. For best results, choose a hook that is at least 1 size smaller than recommended on the yarn band.
All the usual copyright conditions apply fully, you may not distribute, sell or share this pattern without my written permission, but you can sell the finished items. It is optional, but please, add a note that I (Liisa Oks) am the designer. I would appreciate it!
If you need any help with the pattern, either ask in my Ravelry group or Facebook group (Rav: „Kirju kui Liblikas designs and CALs“ and FB: „Amigurumi MCAL  by Kirju kui Liblikas – salajane koosheegeldamine“) or message me in Ravelry – I will be happy to help. If you wish, please share your creations in the groups mentioned – it is fun to see others’ work.

Special abbreviations
Dblinc – double increase, 3 sts in the same st.

Head (Make 1)
Magic ring and 6 sc into it. Crochet spirally in amigurumi technique.
1.round: inc into every stitch. (12)
2.round: *1 sc, inc* 6 times. (18)
3.round: *2 sc, inc* 6 times. (24)
4.round: *3 sc, inc* 6 times. (30)
5.round: *4 sc, inc* 6 times. (36)
6.round: *5 sc, inc* 6 times. (42)
7.round: *6 sc, inc* 6 times. (48)
Rounds 8-16: sc evenly around.
17.round: *6 sc, dec* 6 times. (42)
18.round: *5 sc, dec* 6 times. (36)
19.round: *4 sc, dec* 6 times. (30)
20.round: *3 sc, dec* 6 times. (24)
21.round *2 sc, dec* 2 times. (18)
Rounds 22-23: sc evenly around.
Fasten off and leave a long yarn tail.
Embroider the eyes on the felt separately, cut them out and sew on the doll’s head with small stitches.

Body (Make 1)
Magic ring and 6 sc into it. Crochet spirally in amigurumi technique.
1.round: inc into every stitch.
2.round: *1 sc, inc* 6 times.  
3.round: *2 sc, inc* 6 times.
4.round: *3 sc, inc* 6 times.
5.round: *4 sc, inc* 6 times.
Rounds 6-10: Sc evenly around.
11.ring: *4 sc, dec* 6 times.
Rounds 12-15: Sc evenly around.
11.ring: *3 sc, dec* 6 times
Rounds 17-20: Sc evenly around
11.ring: *2 sc, dec* 6 times
Lõpeta heegeldamine ja jäta pikk lõngasaba.

Feet
Ch 6. Crochet spirally in amigurumi style.
1.round: Skip 1 st, 4 sc, dblinc, continue crocheting on the other side of the chain, 4 sc, dblinc.
2.round: 5 sc, dblinc, 6 sc, dblinc, 1 sc.
3.round: 6 sc, dblinc, 8 sc, dblinc, 2 sc.
Rounds 4-5: Sc evenly around.
6.round: 6 sc, dec 3 times, 8 sc.
7.round: 5 sc, dec 3 times, 6 sc.
8.round: 5 sc, dec 2 times, 5 sc.
Rounds 9-18: Sc evenly around.

Arms (Make 2)
Magic ring and 6 sc into it. Crochet spirally in amigurumi technique.
1.round: *1 sc, inc* 3 times. (9)
Rounds 2-18: Sc evenly around.
Fasten off and leave a long yarn strand for sewing.

Sew the head and the hands to the body. Add hair and accessories to the doll. Congratulations, your doll is finished!

New version of the bugs pattern/Uusversioon ussikeste mustrist

Picture

Hei!
Igatahes, ussikeste mustri kirjutasin ma oma blogisse juba kaua aega tagasi. Peale selle kirjutamist olen aga hakanud oma mustreid hoopis hoolikamalt vormistama, nii et kuigi ussikeste mustris vigu pole, oli seda ebameeldivam lugeda. Seega, siin on uusversioon – ja nüüd ka eesti keeles!

Ussikesed
Märkus: Sa ei pea mustrit 100% järgima, vaid võid lisada oma täiendusi. Kõik ussikesed on erinevad – mõned väiksemad, mõned suuremad. Kui soovid, lisa lipsukesi jms.
Materjalid:
Lõng: Igasugune lõng sobib. Mina kasutasin puuvillast lõnga Capri ja2.5mm heegelnõela. Heegelnõel tasub valida lõngavööl soovitatust vähemalt üks number väiksem. 
Heegelnõel
Täitematerjal
Nõel
Käädid
Veidi kannatust
Turvasilmad
Tiibade jaoks vilti.

SUURED USSIKESED
Alusta ussikese peast. Heegelda amigurumi tehnikas spiraalselt.
1.ring: Võluring ja 6 ks sinna.
2.ring: 2 ka igasse silmusesse.
3.ring: (1 ks järgmisesse silmusesse, kasv) 6 korda.
4.ring: (1 ks järgmisesse 2 silmusesse, kasv) 6 korda.
5.ring: (1 ks järgmisesse 3 silmusesse, kasv) 6 korda.
6-8.ring: 1 ks igasse silmusesse. Lisa soovi korral turvasilmad.
9.ring: (1 ks järgmisesse 3 silmusesse, kah) 6 korda.
10.ring: (1 ks järgmisesse 2 silmusesse, kah) 6 korda.
11.ring: (1 ks järgmisesse 2 silmusesse, kasv) 6 korda.
12-14.ring: 1 ks igasse silmusesse.
15.ring: (1 ks järgmisesse 2 silmusesse, kah) 6 korda.
16.ring: (1 ks järgmisssse silmusesse, kah) 6 korda.
17.ring: (1 ks järgmisesse silmusesse, kasv) 6 korda.
18.ring: 1 ks igasse silmusesse.
19.ring (1 ks järgmisesse silmusesse, kah) 6 korda.
20.ring: Kah 6 korda.

VÄIKESED USSIKESED
Alusta ussikese peast. Heegelda amigurumi stiilis spiraalselt.
1.ring:Võluring ja 6 ks sinna.
2.ring: 2 ks igasse silmusesse.
3.ring: (1 ks järgmisesse silmusesse, kasv) 6 korda.
4.ring: (1 ks järgmisesse 2 silmusesse, kasv) 6 korda.
5-7.ring: 1 ks igasse silmusesse. Lisa soovi korral turvasilmad.
8.ring: (1 ks järgmisesse 2 silmusesse, kah) 6 korda.
9.ring: (1 ks järgmisesse 2 silmusesse, kasv).
10-12.rida: 1 ks igasse silmusesse.
13.rida: (1 ks järgmistesse 2 silmusesse, kah) 6 korda.
14.rida: (1 ks järgmisesse silmusesse, kah) 6 korda.
15.rida: (1 ks järgmisesse silmusesse, kasv) 6 korda.
16.rida: 1 ka igasse silmusesse. 
17.rida: (1 ks, kah) 6 korda.
18.rida: Kah 6 korda.

INGLISE KEELES
IN ENGLISH

Hi!
Anyways, I had written the pattern for these little bugs a long time ago. After publishing this one  I’ve learnt much more about patterns and I’ve been writing my patterns in a much more careful manner – and although there are no mistakes in the bugs pattern, it was uncomfortable to read. So, here is the newer version -and now both in English and Estonian. I hope you’ll enjoy making them!

Note: You don’t have to follow the pattern entirely. All of the bugs I’ve made are different – some are smaller, some bigger. You can add bows etc.

Materials: Yarn. You can use any yarn, I used cotton yarn Capri and a 2.5mm hook. Use a hook that’s at least 1 size smaller than suggested on the yarn label.
Crochet hook
Polyester fiberfill
Safety eyes
A bit of patience 
Needle 
Scissors
Felt for the wings

SMALL BUGS
Start from head.
1.row: Magic ring and 6 sc into it.
2.row: Work 2 sc into every stitch.
3.row [1 sc in the next st, inc] 6 times.
4.row [1 sc in the next 2 sts, inc] 6 times.
5-7.row: Sc evenly around. If you want, add safety eyes.

8.row: [1 sc in the next 2 sts, dec] 6 times.
9. row: [1 sc in the next 2 sts, inc] 6 times.
10-12.row: Sc evenly around.
13. row [1 sc in the next 2 sts, dec] 6 times.
14.row [1 sc in the next st, dec] 6 times.
15.row [1 sc in the next st, inc] 6 times.
16.row: Sc evenly around,
17.row: [1 sc in the next st, dec]
18.row:dec 6 times.
Cut the yarn and draw through the leftover 6 stitches.

BIG BUGS
Start from head. Crochet spirally in amigurumi style.
1.row Magic ring and 6 st into it.
2.row Inc into every stitch (12 st)
3.row: [1 sc in the next st, inc] 6 times.
4.row: [1 sc in the next 2 sts, inc] 6 times.
5. row: [1 sc in the next 3 sts, inc] 6 times.
6-8.row: Sc evenly around.

9. row: [1 sc in the next 3 sts, dec] 6 times.
10.row: [1 sc in the next 2 sts, dec] 6 times.
11.row: [1 sc in the next 2 sts, inc] 6 times.
12-14.row: Sc evenly around.
15. row: [1 sc in the next 2 sts, dec] 6 times.
16.row: [1 sc in the next st, dec] 6 times.
17.row: [1 sc in the next st, inc] 6 times.
18.row: Sc evenly around,
19.row: [1 sc in the next st, dec] 6 times.
20.row: dec 6 times.
Cut the yarn and draw through leftover 6 stitches.


3rd clue of Bibi Amethyst CAL

Hi!
It is time for the 3rd clue of MCAL Bibi! 🙂
Share your photos or ideas with other crocheters too in the Ravelry and Facebook groups (FB: “Amigurumi MCAL 2016 by Kirju kui Liblikas” and Ravelry “Kirju kui Liblikas designs and CALS”).  If you have any questions, feel free to ask me.
 I hope you’ll have a great time making her. 🙂

Arms:
Round 1: Magic ring and 6 sc into it. (6 sts)
Round 2: *1 sc in the next st, 2 sc in next* 3 times. (9 sts)
Rounds 3-21: Sc evenly around. (9 sts)
Fasten off.
Attach all the parts. If the doll will be decorative or for a kid older than 4 years, you can also add a pom-pom for the tail.
Dress
The dress is crocheted in rows and later sewn together at the back. A new abbreviation is used – hdc.inc, which means 2 hdc in the same stitch.
Ch 29.
Row 1: Turn, 1 sc in the 2nd ch, sc until the end of the row.
Row 2: Ch 2 and 2 hdc in the same stitch, hdc 5, ch 7, skip 3 st, hdc 11, ch 7, skip 3 st, hdc 5, inc. Turn.
Row 3: Ch 2 and 2 hdc in the same stitch, hdc 6, 9 hdc in the ch, hdc 11, 9 hdc in the ch, hdc 6, inc. Turn.
Change to another color.
Row 4: Ch 2, hdc in each stitch across. Turn.
Row 5: Ch 2, hdc.inc in each stitch across. Turn.
Rows 6-15: Ch. 2, turn, hdc in each st. across
If you wish, do a row of crab stich (also known as reverse sc) to finish off. Sew the dress together at the back. Congrats, your rabbit is finished! 🙂

I really hope you enjoyed making her! 🙂

2nd clue of Bibi Amethyst CAL

Hi!
It was a quite new situation as my blog wasn’t working due to the hacking attacks yesterday (as over a half of popular American sites). Now it is fixed and I can post it! 🙂
Ears
Ch 23. Do not join.
1st round: 1 sc in the 2nd ch, sc 2, hdc 4, dc 14, *dc 2, ch 2, dc 2* into the next st. Start working at the bottom loops of the starting chain. Dc 14, hdc 4, sc 3, join with a sl st to the 1st ch st.
2nd round: ch 1, sc 3, hdc 4, dc 16, *dc 2, ch 2, dc 2* into the next st, dc 16, hdc 4, sc 3, join with a sl st in the 1st ch.
Head:
Round 1: Magic ring and 6 sc into it. (6 sts)
Round 2: work 2 sc in every st around (12 st)
Round 3 *1 sc in the next stitch, 2sc in next* 6 times (18 sts)
Round 4*1 sc in the next 2 stitches, 2sc in next * 6 times (24 sts)
Round 5: *1 sc in the next 3 stitches, 2sc in next * 6 times (30 sts)
Round 6: *1 sc in the next 4 stitches, 2sc in next * 6 times (36 sts)
Round 7: *1 sc in the next 5 stitches, 2sc in next * 6 times (42 sts)
Rounds 8-12: Sc evenly around.
Round 13: *1 sc in the next 5 st, dec* 6 times. (36 sts)
Round 13: *1 sc in the next 4 stitches, dec* 6 times (30 sts)
Round 14: *1 sc in the next 3 stitches, dec* 6 times (24 sts) (stuff it here)
Round 15: *1 sc in the next 2 stitches, dec* 6 times (18 sts)
Fasten off, leave a long tail for sewing. Sew head to the body. The body has one more stitch, but it should be easy to sew it up. Attach the ears to the head.
The place to add your safety eyes completely depends on your choice. I cut small circles out of felt and made a hole at the center, then poked a safety eye through the hole and the crocheted head and attached the back of it. This way I got tiny, but cute circles around the eyes.

Share your photos or ideas with other crocheters too in the Ravelry and Facebook groups (FB: “Amigurumi MCAL 2016 by Kirju kui Liblikas” and Ravelry “Kirju kui Liblikas designs and CALS”).  If you have any questions, feel free to ask me.
 I hope you’ll have a great time making her. 🙂

First clue of CAL Bibi Amethyst :)

Hi!
Well, today is the day when the 1st clue of Rabbit Bibi Amethyst is released. Thanks to my amazing testers! You can soon see their work and others’ too on Bibi’s Ravelry page (which I warmly suggest you to see because it has a lot of important information!  http://www.ravelry.com/patterns/library/rabbit-bibi-amethyst-cal 🙂 ).
Okay, here it comes! 🙂

This animal, Bibi or Amethyst – whichever you want to call her – is big and full of character. She has colorful ears, face and eyes as well as a nice smile. If you prefer, you can also crochet a dress for her and even get more creative with accessories. 🙂
Abbreviations:
Sc – single crochet
Hdc – half double crochet
Dc – double crochet
Inc – increase
Dec – decrease
Skill level: Intermediate, but very suitable for a beginner too.
Yarn: I used 3 skeins of DROPS Paris (2 skeins of color 35 (yellow) for the body, legs, head and arms and 1 skein of color 60 (dark old pink/purple for the ears and the yoke of the dress) and 1 skein of DROPS Cotton Light in color 25 (light lilac) for the dress. DROPS Paris is worsted weight and DROPS Cotton Light is DK.
Hook: I used a 2.5 mm hook, but I really crocheted loosely with this yarn – usually I would use a hook 1 time smaller than the number suggested on the label.
Additional materials: Filling, safety eyes, some felt (optional).

Legs and body:
Magic ring and 6 sc into it.
Round 1: Work 2 sc in every st. (12s sts)
Round 2: *1 sc, inc* 6 times. (18 sts)
Rounds 3-5: Sc evenly around. (18 sts)
Round 6: 2 sc, dec 3 times, 10 sc. (15 sts)
Round 7: Sc evenly around. (15 sts)
Round 8: 10 sc, inc 3 times, 2 sc. (18 sts)
Rounds 9-10: Sc evenly around. (18 sts)
Round 11: 2 sc, dec, 2 sc, dec, 4 sc, inc in the next st, 2 sc, inc, 2 sc. (18 sts)
Rounds 12-16: 1 sc in every st. (18 sts)
Fasten off, leaving a tail for sewing. Make another leg this way (don’t fasten off this one) and stuff both. Thanks to the increases and decreases, the legs have a leg shape.
Round 17: 9 sc, now start crocheting on the other leg (place them next to each other and both facing the same direction, you will be starting at the next unworked stitch available), 17 sc, skip the last sc, now crochet from the first leg, 9 sc. Later you can sew up the hole (from inside) using the yarn from the 1st leg. (35)
Round 18: inc, 8 sc, inc, 7 sc, inc, 8 sc, inc, 8 sc. (39 sts)
Round 19: inc, 18 sc, inc, 20 sc. (42 sts)
Rounds 20-23: sc evenly around. (42 sts)
Round 24: *7 sc, dec* 4 times, 6 sc. (38 sts)
Rounds 25-27: Sc evenly around. (38 sts) Start stuffing the body and continue to stuff as you go.
Round 28: *6 sc, dec* 4 times, 6 sc. (34 sts)
Round 29: Sc evenly around. (34 sts)
Round 30: 15 sc, dec, 15 sc, dec. (32 sts)
Round 31: Sc evenly around. (32 sts)
Round 32: 14 sc, dec, 14 sc, dec. (30 sts)
Round 33: Sc evenly around. (30 sts).
Round 34: 13 sc, dec, 13 sc, dec. (28 sts)
Round 35: Sc evenly around. (28 sts)
Round 36: 12 sc, dec, 12 sc, dec. (26 sts)
Round 37: Sc evenly around. (26 sts)
Round 38: 11 sc, dec, 11 sc, dec. (24 sts)
Round 39: Sc evenly around. (24 sts)
Round 40: 10 sc, dec, 10 sc, dec. (22 sts)
Round 41: 9 sc, dec, 9 sc, dec. (20 sts)
Fasten off.

Share your photos or ideas with other crocheters too in the Ravelry and Facebook groups (FB: “Amigurumi MCAL 2016 by Kirju kui Liblikas” and Ravelry “Kirju kui Liblikas designs and CALS”).  If you have any questions, feel free to ask me.
 I hope you’ll have a great time making her. 🙂